はじめまして、フリーランスのますみです!
『一人一人が自立・共存・革新している「クリエイターエコノミー」を創る。』というビジョンに向けて活動しています。

NodeJSのExpressフレームワークにMySQLを組み込み、Herokuにデプロイする方法をさっくりと解説します。
入門向けではありませんが、それぞれ少しずつ触れたことのある人であれば、理解できると思います。
開発環境
- OS:
macOS Mojave (v10.14.5) - Git:
git version 2.20.1 (Apple Git-117) - NodeJS:
v8.12.0 - Express:
v4.16.0 - MySQL:
mysql Ver 8.0.15 for osx10.14 on x86_64 (Homebrew) - Heroku:
heroku/7.25.0 darwin-x64 node-v11.14.0
条件
- それぞれの言語の環境設定が完了している。
参考リンク集(初心者の方に向けて)
- Git => Let’s Start Github!!
- NodeJS => Node.js入門 – ドットインストール
- Express => ExpressTemplate
- MySQL => MySQL 入門
- Heroku => Heroku初心者がHello, Herokuをしてみる
1. Herokuでアプリを作成する
まず、node-mysql-herokuという名前のサンプルアプリをここでは作っていきたいと思います。以下のようなbashを叩き、herokuのアプリを生成します。
ここで、node-mysl-heorkuというアプリ名にすると、重複してドメインが取れないため、それぞれ独自のアプリ名をこれ以降用いてください。また、https://node-mysql-heroku.herokuapp.comにアクセスすると、完成したンプルのプログラムが出てきてしまうため、ご注意ください。
$ heroku create node-mysql-heroku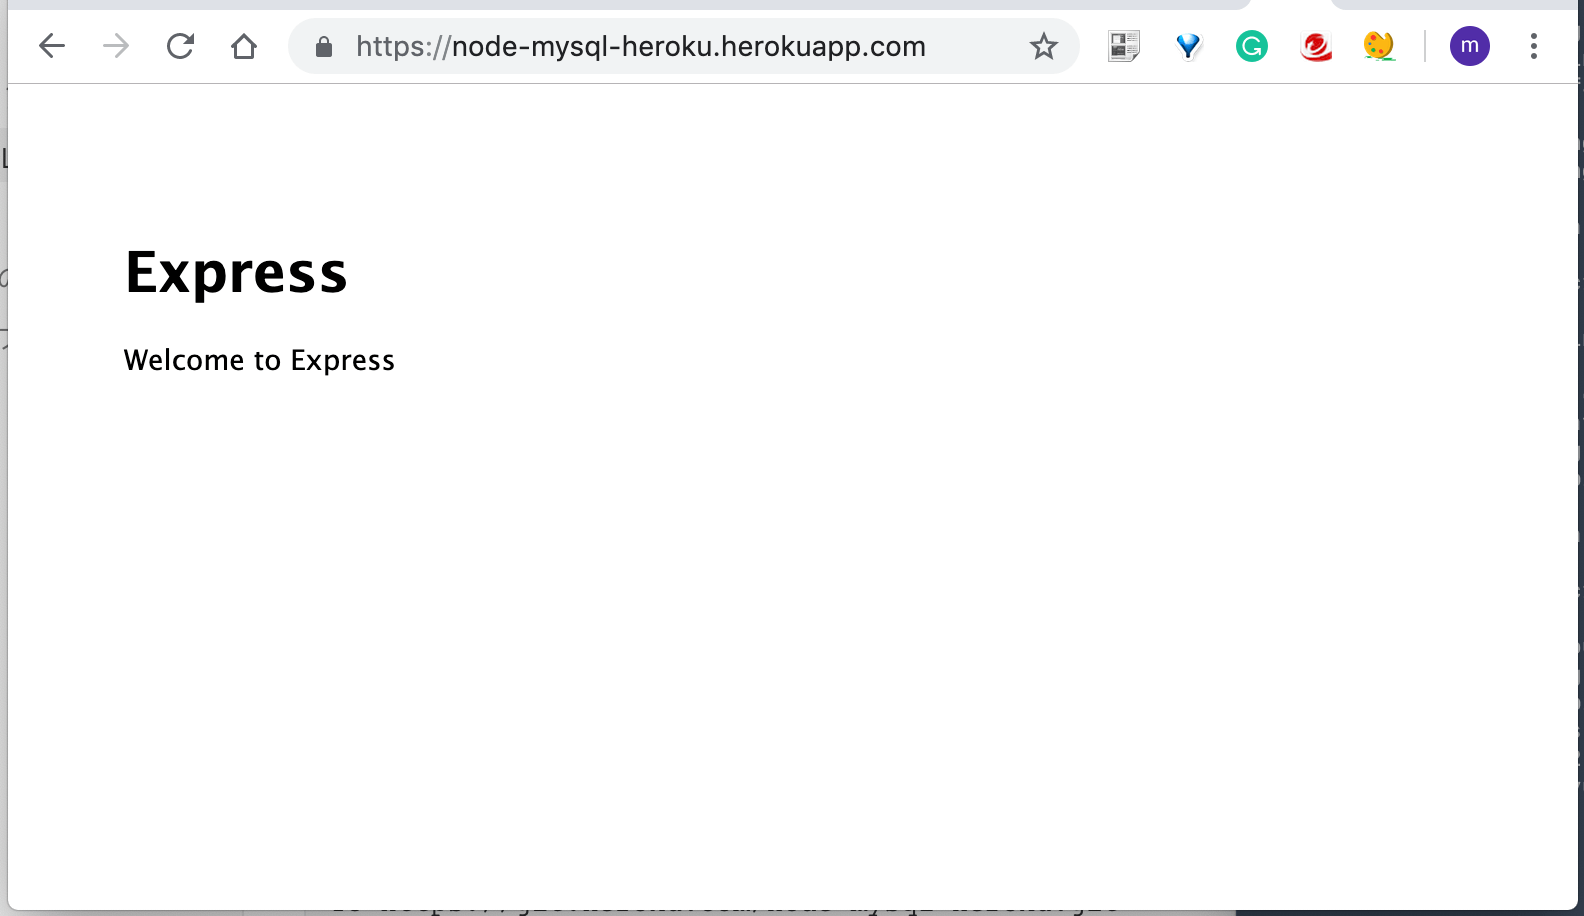
Creating ⬢ node-mysql-heroku... donehttps://node-mysql-heroku.herokuapp.com/ | https://git.heroku.com/node-mysql-heroku.gitもしもアプリがうまく作成されていると、https://node-mysql-heroku.herokuapp.comにアクセスすると、次のような画面になります。

2. Expressのプロジェクトを作成する
次に、以下のbashを叩き、Expressのプロジェクトを作成します。
(私は、ejs & sassが好みなため、オプションを追加しました。)
$ express --view=ejs --css=sass --git node-mysql-heroku
$ cd node-mysql-heroku
$ npm install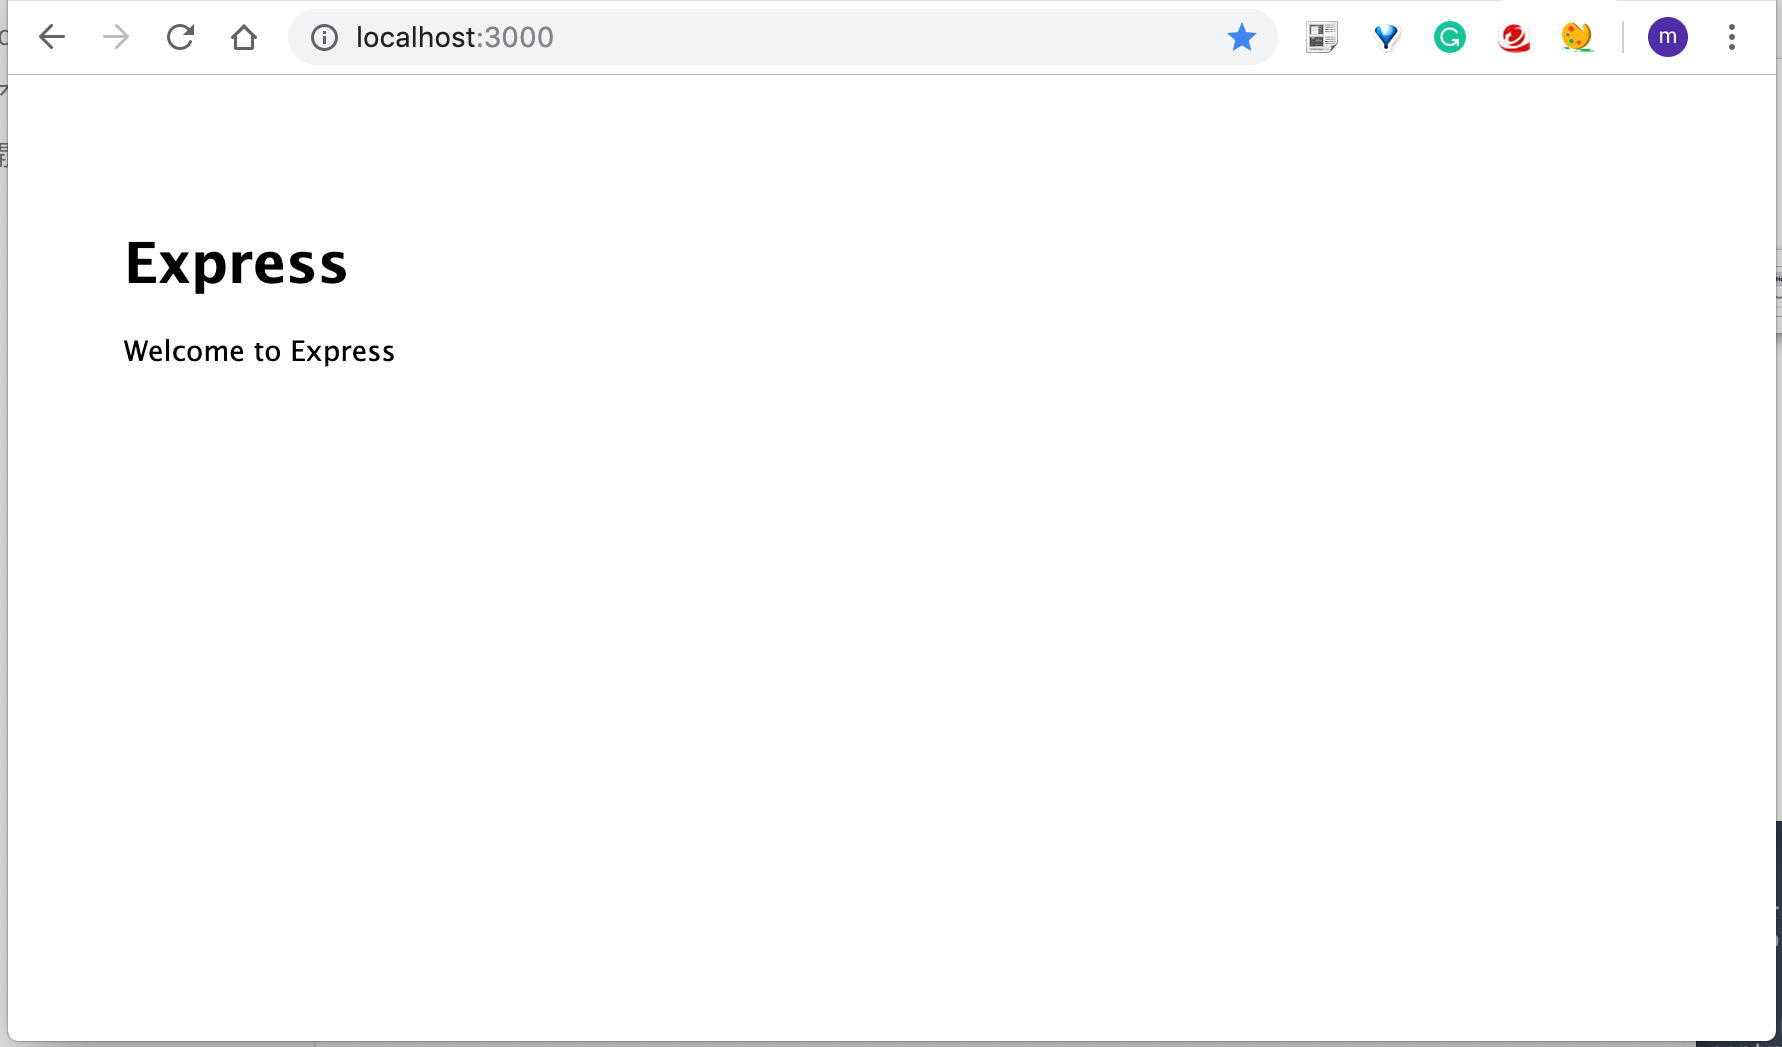
$ npm startもしもプロジェクトがうまく作成されていると、http://localhost:3000/にアクセスすると、次のような画面になります。
3. プロジェクトをHerokuにデプロイする
続いて、Expressで作成したプロジェクトをHerokuにデプロイします。
以下のbashを叩きましょう。
$ git init
$ heroku git:remote -a node-mysql-heroku
set git remote heroku to https://git.heroku.com/node-mysql-heroku.git$ git add .
$ git commit -m "First Commit"
$ git push heroku master
...
To https://git.heroku.com/node-mysql-heroku.git * [new branch] master -> master
もしもプロジェクトをうまくデプロイできていると、 https://node-mysql-heroku.herokuapp.com/にアクセスして、次のような画面になります。
4. MySQLをExpressに組み込む
一通り、デプロイまで走りきったところで、ExpressのプロジェクトにMySQLを導入していきましょう。まず、mysqlをbashからnpm installします。
$ npm install mysql --save
+ mysql@2.17.1
added 3 packages from 11 contributors and audited 686 packages in 2.41s
found 0 vulnerabilities
インストールが完了したら、次のbashコマンドで、MySQLとExpressを繋ぐスクリプトを作成します。
$ touch public/javascripts/mysqlConnection.jsスクリプトが完成したら、その中に次のようなコードを打ち込んでいきます。
// Define and Import the variables
const mysql = require('mysql');
const databaseName = 'sample';
const tableName = 'todoList';
// Create Connection
const connection = mysql.createConnection({ host: 'localhost', user: 'root', password: 'password' // depends to the user
});
// Connect Function
connection.connect((error) => { if (error) { console.error('Database Connect Error:' + error); return; } else { console.log('Database Connection Success: id=' + connection.threadId); }
});
// Initializing Database
connection.query('CREATE DATABASE IF NOT EXISTS ??;', databaseName);
connection.query('USE ??;', databaseName);
connection.query('CREATE TABLE IF NOT EXISTS ??(id INT AUTO_INCREMENT PRIMARY KEY NOT NULL, name TEXT);', tableName);
connection.query('SHOW FIELDS FROM ??;', tableName, (error, response) => { console.log(response);
});
// Export Connection
module.exports = connection;具体的な説明としては、ざっくり言うと、mysqlとconnectionを作り、データベースの初期化を行なっているスクリプトです。本来は、SQLのシェルスクリプトを叩いて行くと思いますが、ここでは簡略化して、queryを投げています。
次に、app.jsへ行き、先ほど作った、mysqlConnection.jsをインポート(require)します。var app = express();の下あたりに追加しましょう。
...
var app = express();
_mysqlConnection = require('./public/javascripts/mysqlConnection.js');
...
これで準備は完了です。最後に、以下のbashを叩き、コネクションの結果を確認しましょう。
$ npm start以下のようなコンソールが出力されたら、オッケーです。
(データベースの中のテーブルのフィールドの出力結果です。)
Database Connection Success: id=27
[ RowDataPacket { Field: 'id', Type: 'int(11)', Null: 'NO', Key: 'PRI', Default: null, Extra: 'auto_increment' }, RowDataPacket { Field: 'name', Type: 'text', Null: 'YES', Key: '', Default: null, Extra: '' } ]
5. 最低限の機能を用意する
エンジニア界ではCRUDという単語があり、Create / Read / Update / Deleteに当たります。またMySQLだと、それぞれINSERT / SELECT / UPDATE / DELETEに相当します。
ここでは、とりあえずCreateとReadだけを簡易的に実装し、todoでも追加できるようにしましょう。
まず、routesフォルダの中のindex.jsのファイルを以下のように書き換えます。
ここでは、/にアクセス(get)した時に、データベースの中を読み込み(Read)して、表示しています。また、todoを作成(Create)したい時のために、/に対してデータを送信(post)された時に、追加されるようにしました。(本来は別のaddTask.jsなどの別のモジュールを作成した方が一般的だが、ここでは簡易的にindex.jsの中に組み込んでいます。)
var express = require('express');
var router = express.Router();
// Require mysqlConnection
const connection = require('../public/javascripts/mysqlConnection');
/* GET index page. */
router.get('/', function (req, res, next) { indexRender(res);
});
/* POST new todo. */
router.post('/', function (req, res, next) { console.log('CreateTodo'); console.log(req.body.todo_content); connection.query('INSERT INTO todoList (name) VALUES(?);', req.body.todo_content, (error, response) => { if (error) { console.error('Insert Error:' + error); } else { console.log('Insert Success'); indexRender(res); } return; });
});
/* Render Function */
const indexRender = (res) => { connection.query('SELECT name FROM todoList ORDER BY ID ASC;', (error, response) => { if (error) { console.error('Read Error:' + error); } else { console.log('Read Success'); res.render('index', { title: 'Todo List', todos: response }); } return; });
}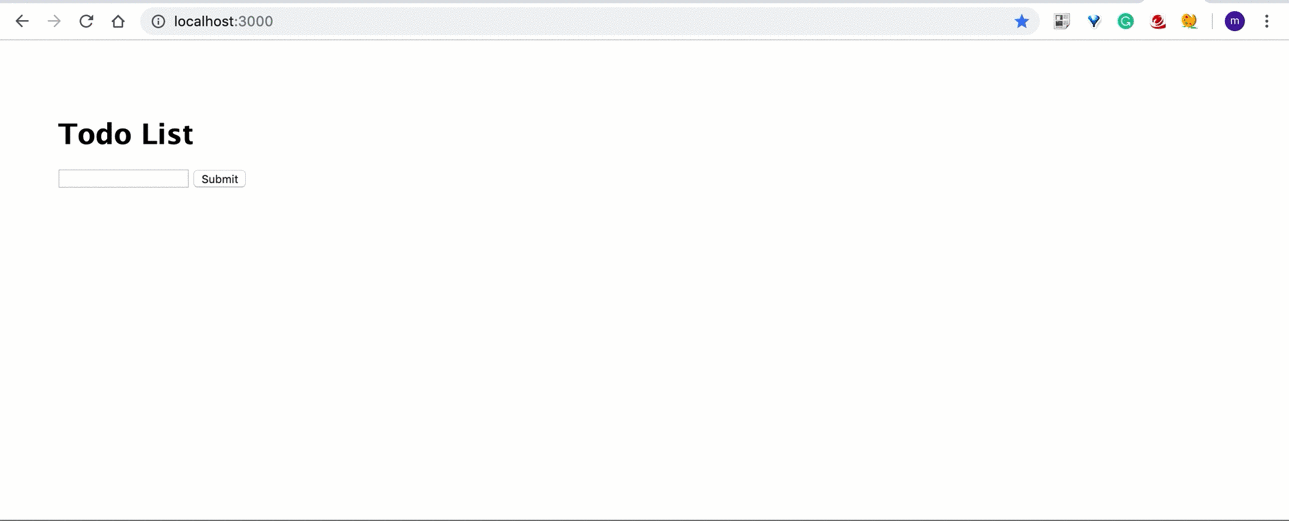
module.exports = router;これで、バックは完成したため、最後にフロント側でtodoを入力して、送信できるようなインターフェースを作成します。viewsの中のindex.ejsを選択して、以下のようなコードを打ち込みます。
<!DOCTYPE html>
<html>
<head> <title><%= title %></title> <link rel='stylesheet' href='/stylesheets/style.css' />
</head>
<body> <h1><%= title %></h1> <div id="createForm"> <form action="/" method="post"> <input type="text" name="todo_content" value=""> <button type="submit"> Submit </button> </form> </div> <div id="todoList"> <% for(var i=0; i < todos.length;i++) { %> <div><%= todos[i].name %></div> <% } %> </div>
</body>
</html>
以下のように、文字を入力して、Submitボタンを押して、画面にタスクが表示されたら完成です。デザインに関しては割愛させていただきます。
6. HerokuのDatabaseと連携する
最後にHerokuにデータベースを構築するために、ClearDBというHerokuのアドオンを使います。
まずアドオンを追加するために次のBashを叩きます。(*****の中には、各ユーザー特有の文字列が入ります。)
$ heroku addons:create cleardb:ignite
Creating cleardb:ignite on ⬢ node-mysql-heroku... free
Created ***** as CLEARDB_DATABASE_URL
Use heroku addons:docs cleardb to view documentation次に、ClearDBが作成されたため、自分のコードに組み込むためのCLEARDB_DATABASE_URLを次のBashで取得します。
$ heroku config | grep CLEARDB_DATABASE_URL
CLEARDB_DATABASE_URL: mysql://*****?reconnect=true最後に、このCLEARDB_DATABASE_URLをNodeJSの中のmysqlConnection.jsに組み込んでいきます。
ここで、CLEARDB_DATABASE_URLの中のURLの構成としては、次のようになります。
mysql://ユーザ名:パスワード@サーバ名/データベース?reconnect=trueこの規則に合わせて、すでに打ち込んであるmysqlConnection.jsの6〜12行目あたりを、以下のように打ち直します。
// Create Connection
const connection = mysql.createConnection({ host: 'サーバ名', user: 'ユーザー名', password: 'パスワード', database: 'データベース'
});これで、Connectionの設定は全て完了しましたが、sampleというデータベースはHerokuのデータベース上に存在しないため、mysqlConnection.js におけるそれ関わるコードをコメントアウトします。(/* ここをコメント化 */と書いてある3箇所の部分をコメントにします。)
// Define and Import the variables
const mysql = require('mysql');
// const databaseName = 'sample'; /* ここをコメント化 */
const tableName = 'todoList';
// Create Connection
const connection = mysql.createConnection({ host: 'サーバ名', user: 'ユーザー名', password: 'パスワード', database: 'データベース'
});
// Connect Function
connection.connect((error) => { if (error) { console.error('Database Connect Error:' + error); return; } else { console.log('Database Connection Success: id=' + connection.threadId); }
});
// Initializing Database
// connection.query('CREATE DATABASE IF NOT EXISTS ??;', databaseName); /* ここをコメント化 */
// connection.query('USE ??;', databaseName); /* ここをコメント化 */
connection.query('CREATE TABLE IF NOT EXISTS ??(id INT AUTO_INCREMENT PRIMARY KEY NOT NULL, name TEXT);', tableName);
connection.query('SHOW FIELDS FROM ??;', tableName, (error, response) => { console.log(response);
});
// Export Connection
module.exports = connection;
これでコードは全て完成したため、次のBashを叩き、アプリをHeorkuにデプロイしましょう。
$ git add .
$ git commit -m "Add: ClearDB"
$ git push heroku masterここで、もしも以下のようなエラーが出た場合は、再起動を試みましょう。
Application error An error occurred in the application and your page could not be served. If you are the application owner, [check your logs for details](https://devcenter.heroku.com/articles/logging#view-logs). You can do this from the Heroku CLI with the command `heroku logs –tail`
DynoおよびWebDynoの再起動をするために、次のBashを叩きます。
$ heroku restart --app node-mysql-heroku
Restarting dynos on ⬢ node-mysql-heroku... done
$ heroku restart web.1 --app node-mysql-heroku
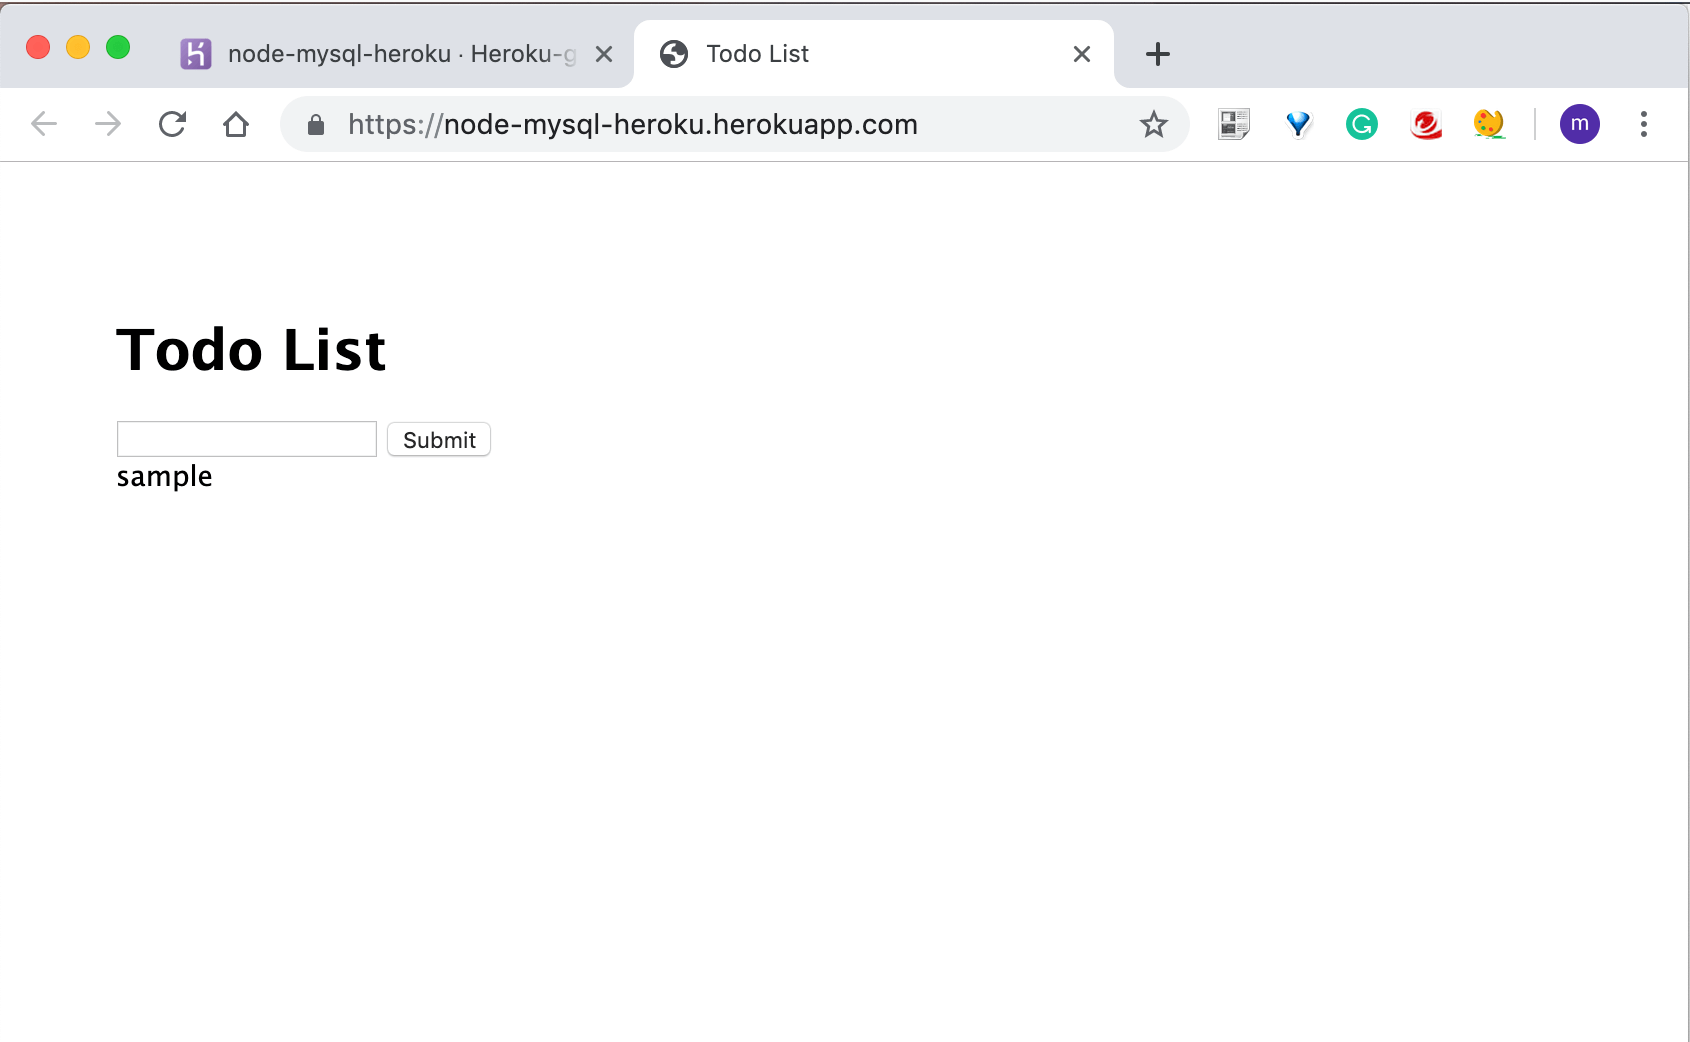
Restarting web.1 dyno on ⬢ node-mysql-heroku... done以下のようなウェブアプリが完成していたら、無事デプロイ完了です。
最後に
いかがだったでしょうか?
この記事を通して、少しでもあなたの困りごとが解決したら嬉しいです^^
おまけ(お知らせ)
エンジニアの仲間(データサイエンティストも含む)を増やしたいため、公式LINEを始めました🎉
「一緒に仕事をしてくれる方」「友だちとして仲良くしてくれる方」は、友だち追加をしていただけますと嬉しいです!(仲良くなった人たちを集めて、「ボードゲーム会」や「ハッカソン」や「もくもく会」もやりたいなと考えています😆)
とはいえ、みなさんにもメリットがないと申し訳ないので、特典を用意しました!
友だち追加後に、アンケートに回答してくれた方へ「エンジニア図鑑(職種20選)」のPDFをお送りします◎